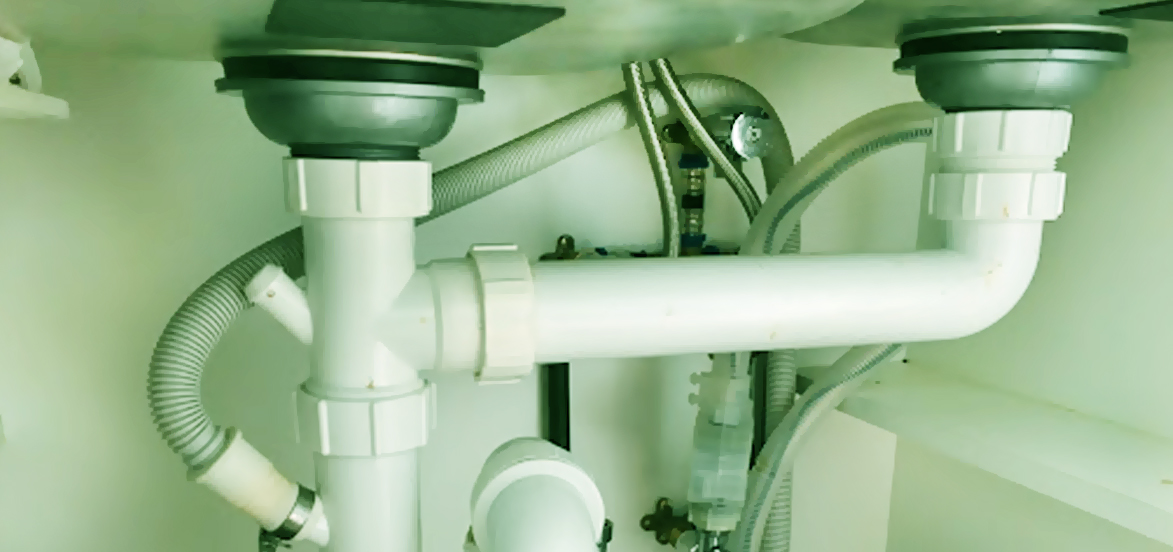
How to Assess Water Damage from Leaking Kitchen Sink
Dealing with water damage under the kitchen sink is a common problem many homeowners often have to go through. Having a pool of water under the sink is not only a problem of cleaning up the mess but also an indication that something is not right with your kitchen plumbing. This post talks about how you can assess water damage from a leaking kitchen. We will also provide an insight into how professional kitchen sink leak detection in San Diego can help.
Just like any other fixture or appliance in your home, the plumbing fixtures under a sink will also wear off over time and start leaking. If it is left unattended for a long period of time, it can result in water damage. The damage can vary from wood rotting and warping to mold and mildew growth. You can try the following steps to assess your water damage and take the necessary action. If you think it is beyond something you can handle, you can always call for professional assistance.
Clearing Out and Soaking Up Under The Sink
As the first step, you should clear out the space under the sink and dry it off. It is an important measure that you should not skip, as it can help stop any secondary damage. It also helps us in locating the source of the leak, which should be done before doing any damage assessment.
Start by removing any cleaning bottles, kitchen utensils, and other items under the sink and close to the pooling of water. Wipe off the items with a dry cloth if they are wet to avoid any further damage.
Once all the items have been moved to a secure place, you should start drying off the space under the sink. Take a dry towel and wipe off the underside of the sink, all the plumbing fixtures, and the entire area under the sink. Make sure that you soak up all the excess water.
Use your hairdryer or any other powerful drying or dehumidifying equipment, if you have any, to dry up the area further. Leave for about three minutes until the majority of water spots disappear.
Possible Sources of the Leak
Before you move on to assessing the water damage, it is essential that you identify the source of the leak and stop the leak temporarily by shutting off the water supply. Below are some common sources that can cause a water leak from a kitchen sink. Check the same in your kitchen to locate the source of the leak.
1. Sink Rim Leaks
A loose or improperly seated sink rim can allow water to seep through the base of the faucet. It can be tested by squeezing a wet sponge over the sink rims and allowing water to dribble. First, inspect whether water is getting under the sink rims and base of the faucets. If it is the culprit, you will be able to see drops of water falling from underneath the sink. However, it may not happen as soon as you dribble water if the rims are not that loose.
2. Water Supply Leaks
There can be leaks on the plumbing fixtures that supply water to the kitchen faucet. The possible areas of leaks are:
- The point where the shutoff valve and the pipe connect.
- The point where the supply pipe and the faucet connect.
- The supply pipe itself.
If there are no signs of water dribbling from these points, check for tiny leaks that might not be visible to the naked eye. Take a tissue paper, wipe off these areas, and see whether you can see any wet spots on the tissue. Certainly, there won’t be a sense of touch for these leakages as the leaks can be too tiny. So, you won’t feel it on your fingertips.
3. Sink Drain Leaks
Similar to the water supply drains mentioned above, there could be leaks associated with the sink drain pipe. To test this, fill the sink bowl with water and inspect the entire drain pipe from the sink to the drain outlet fixed onto the floor or wall. The possible areas of leaks are:
- The point where the sink and the drain pipe connect.
- The point where the drain pipe and the drain outlet connect.
- The drain pipe itself.
Once again, if there are no visible signs of water dribbling from these points, use tissue paper to wipe them off and inspect whether there are any wet spots on the tissue.
How to Discover the Leak? (If none of the above works)
Given above are some of the common sources of a typical sink leak. There’s a chance that the culprit of your leak may not be any of the above. If that’s the case, try out the steps mentioned below to see if you can find the leak in your kitchen sink.
Place a dry towel and an empty vessel that can collect water under every plumbing fixture and area, which you suspect may have a leak. Leave it for some time and check whether the vessels have collected any water or the towel has become wet. If you found either of those things positive, inspect right above the water pooling or spots to locate the leak. If it is a slow leak, you will have to wait for some time to confirm your suspicion.
Make sure that you turn off the respective water supply according to the source of the leak you identified.
If things are not going as planned and have escalated into a position that a DIY project can no longer handle, reach out to professionals of EZ kitchen plumbing services in San Diego. You can sit back and relax while we handle everything for you.
Step-By-Step Guide For Fixing Your Kitchen Sink Leakage
Assess Water Damage
The extent of the damage will vary on several factors, such as the type of materials affected, how long water has been leaking, and water’s ability to rest on a flat surface. Given below are some of the types of damage that you will be able to witness.
Kitchen Cabinet Wood Rotting
The wood of your kitchen cabinet might be rotten if it was severely in contact with water. Especially if your cabinet wood is not treated with a protective layer of paint, there’s a high chance that it will lead to the growth of fungi if the surface isn’t dried quickly. This fungus will slowly start to eat away the wood, which will eventually lead to rotting.
Wood Warping
Similar to how paper gets distorted once it gets wet, the same happens to wood as well. When wood absorbs a lot of water, it expands. When this happens for a longer period of time, drying becomes very difficult. This will cause the wood to warp and buckle over time.
Mold and Mildew Growth
Mold and mildew growth is a much more serious consequence of water damage. Suppose there are any visual signs of mold or any strong odors. In that case, it is highly recommended that you contact a professional water damage restoration partner in San Diego and let them handle the issue.
Mold can be extremely difficult to remove and if it is not taken care of properly, it will grow over time and leave your kitchen flooring, walls, and wood unsalvageable. Worse than that, it also has the potential to cause respiratory health problems like asthma.
Leave Cabinet Doors Open
Leave your cabinet doors open until you take action to fix the water damage. This will allow the cabinets to dry up and remove any source of moisture. Some leak detection experts even recommend that you remove the cabinet doors completely to allow maximum airflow within the space.
If possible, use a fan or any other drying or dehumidifying equipment to blow in the area under the sink to expedite the drying process and remove as much moisture as possible from the surface.
Fixing Water Damage
Now that you have assessed the water damage and have stopped the leak temporarily by shutting off the water supply, the next step is to fix the water damage. Based on the extent of your damage, the tools you have at hand, and your DIY skills, you may be able to fix the water damage by trying the steps below. However, if the damage is in a severe state and you feel like it’s beyond what you can handle, consult a professional at EZ kitchen sink leak detection in San Diego.
If you decide to handle the project yourself, you will need the following.
- Dry clothes and sponges
- Hair Dryer
- Bleach
- Ammonia
- Toothpaste and baking soda
- Mayonnaise and cigarette ashes
- Steel Wool and mineral oil
- Polish
Step 1: Remove Dry Mold
Since you have already soaked up and dried out the space under the kitchen sink, you can move on to removing dry mold. Before you go any further, it is important to assess the severity of the mold. The following steps can only be applied if there’s a basic level of mold that the skills of a regular homeowner can remove. It is vital that you reach out to a professional mold treatment specialist if it goes beyond that.
Assuming that it is in a state that you can handle, use a wet sponge with bleach and water to remove dry mold under the sink. It is crucial that you wear a mask that covers your nose and mouth while doing this. Scrub thoroughly until the mold completely disappears. Since you will be bleaching the entire surface, it will automatically disinfect everything.
Step 2: Cleaning the areas affected by water damage
Wet a dry cloth with ammonia and scrub away the affected areas under the sink thoroughly. After everything has been wiped off and scrubbed away properly, you can take things a step further by applying one of the below-mentioned homemade pastes in the affected areas.
- Mixing toothpaste and baking soda
- Mixing cigarette ashes and mayonnaise
- Mineral oil and steel wool (for severe cases)
Leave it for about 25 minutes before you move on to the next step.
Step 3: Rub the Surface
Once you have applied one of the above pastes, you need to rub it away. Take a dry cloth and start wiping off in a circular motion. Keep doing it until the paste has been completely removed from the surface.
Step 4: Rinse with Water and Polish
Now take another dry cloth, make it slightly moistened with cool water, and wipe over the same areas you did in the previous steps. To give things a better look, you can use polish on the same surface.
Suppose there are no satisfactory results at the end of this process. In that case, it is wise to reach out to a professional water damage restoration partner in Riverside and let them handle the job.
Conclusion
As you might have already figured out, there are a couple of steps that you need to take before you go straight into assessing the water damage from a leaking kitchen sink. Those steps are essential as they can help stop any further damage. As a bonus point, we also talked about how you can fix water damage yourself, given that it is not in a complicated state.
Once again, if you feel like things are getting out of hand, don’t hesitate to reach out to a professional at EZ Plumbing and Restoration for kitchen sink leak detection in San Diego.


